Yet Another Keyboard
Introducing the Yak
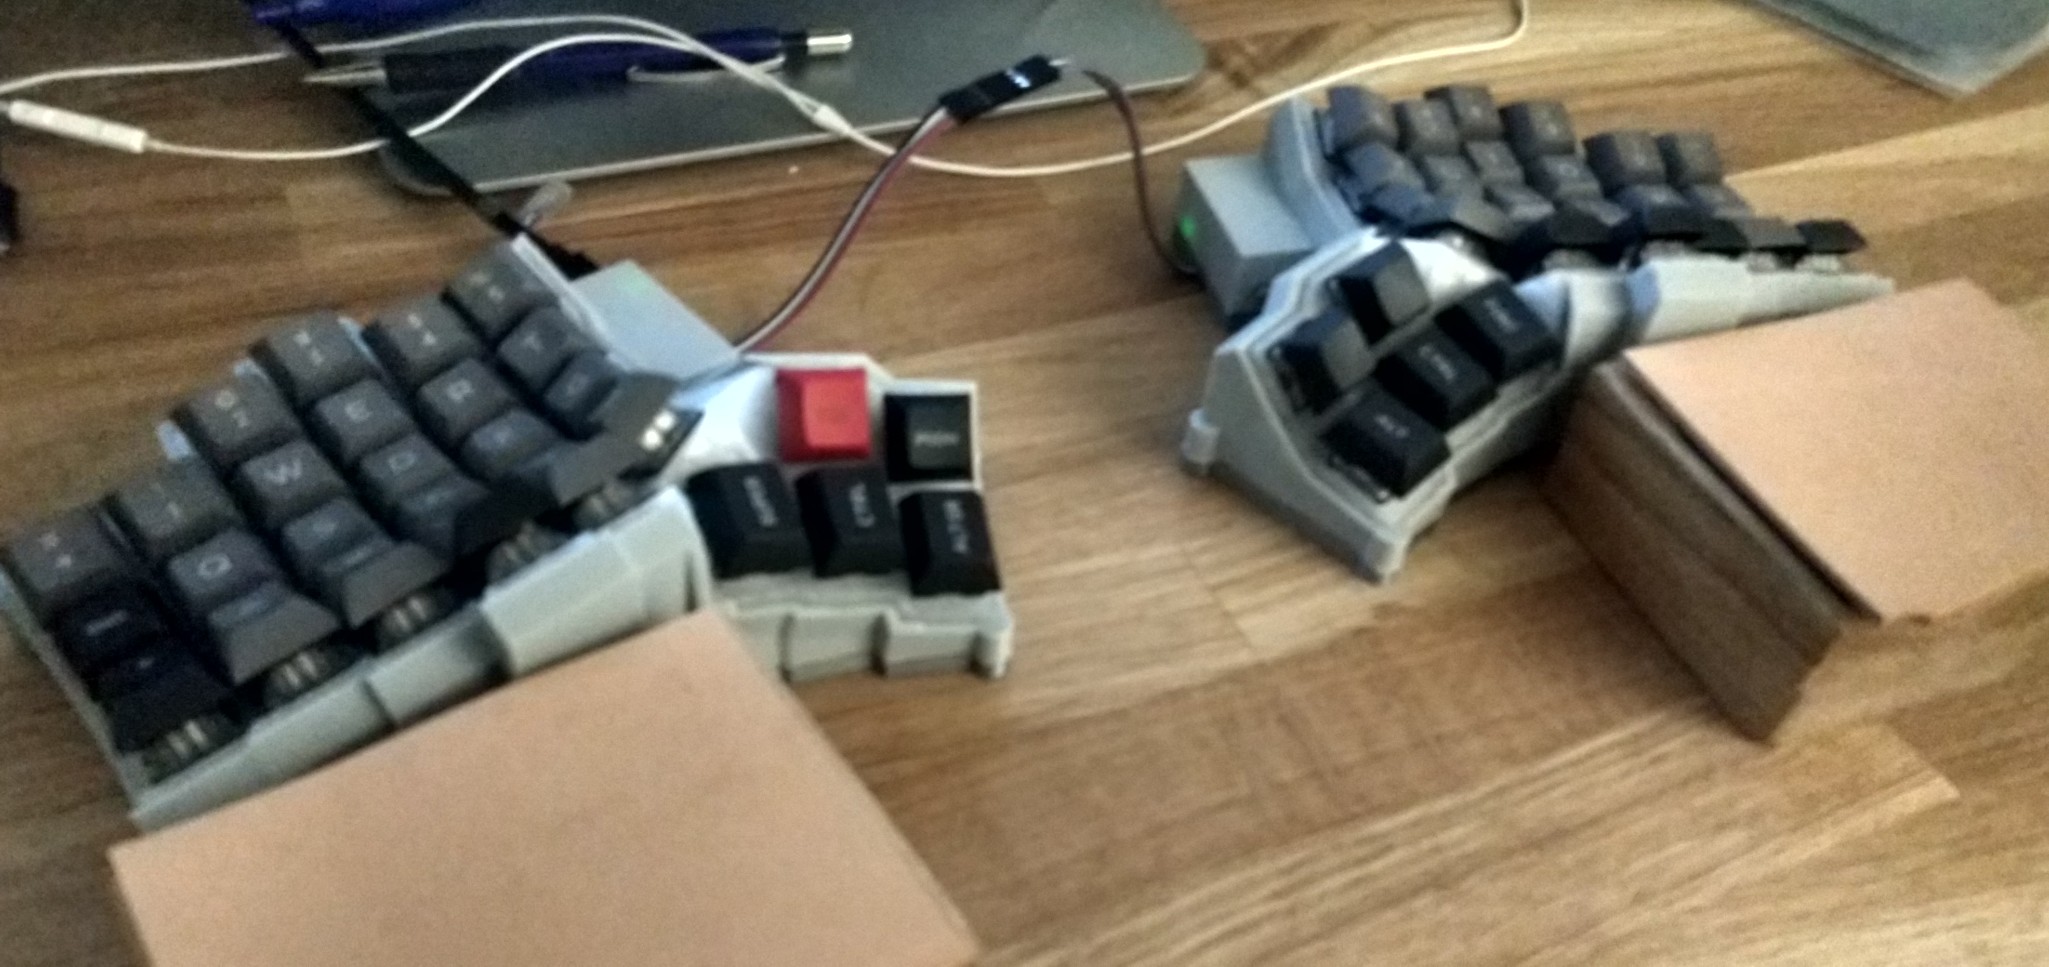
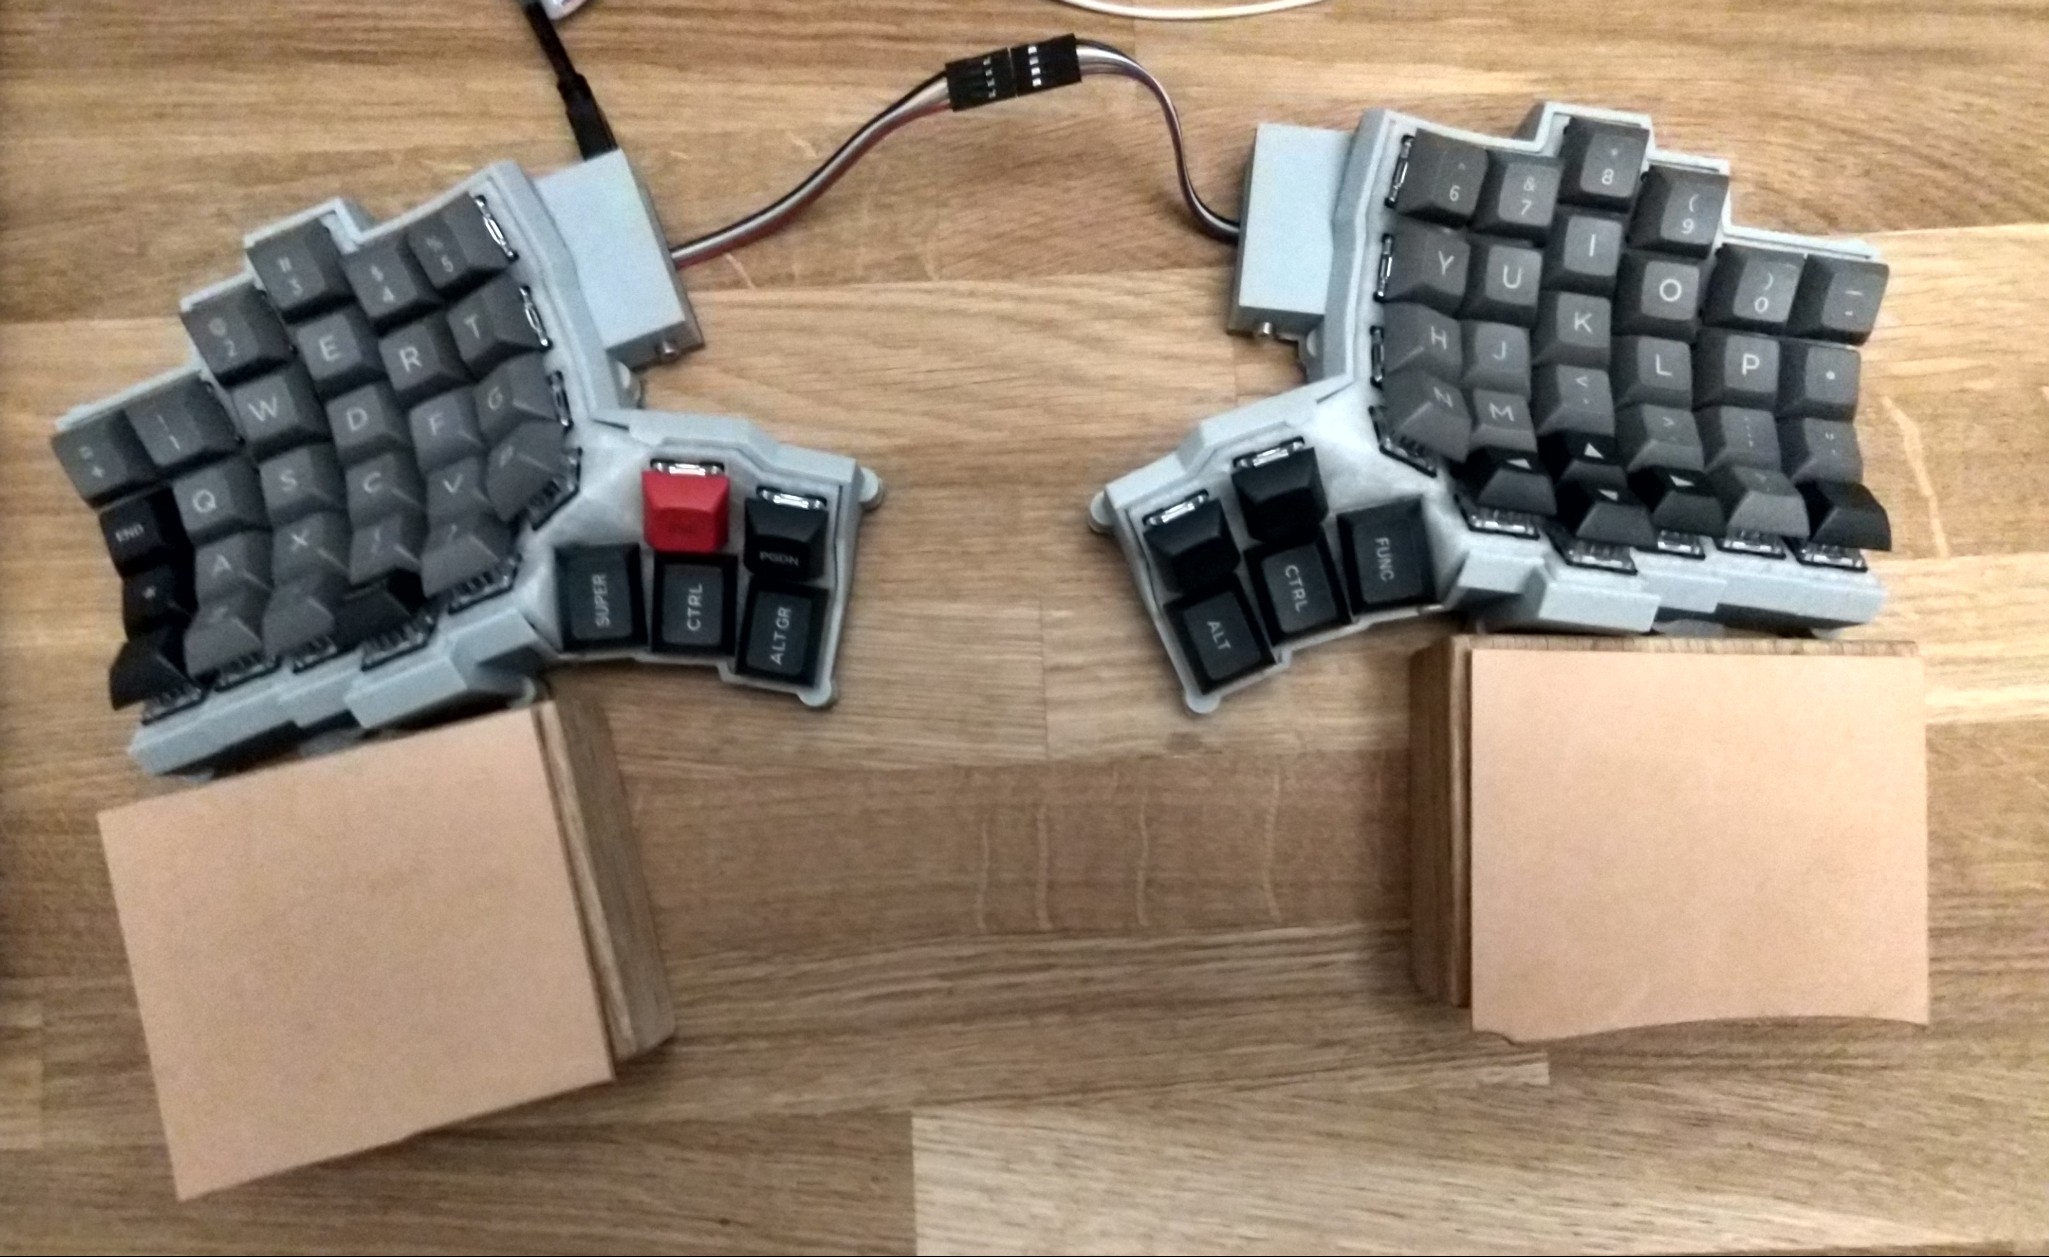
I just finished building a keyboard which I designed myself. Why Yet Another Keyboard? Even though there is a plethora of existing designs based on the Dactyl, none of them really satisfied me for various reasons. And, if I spend the effort building a keyboard, I do not want to compromise on design.
Here are the main characteristics:
- Enough keys
- 6 rows
- thumb clusters
- extras rows for longer fingers
- Ergonomic design
- Split design, to eliminate ulnar deviation and combat pronation
- Curved columns to minimize overextension of fingers
- forward tilt to reduce wrist extension
- All thumb cluster keys accessible without moving the wrist
- Wrist rest
- Staggered columns layout (fits me best)
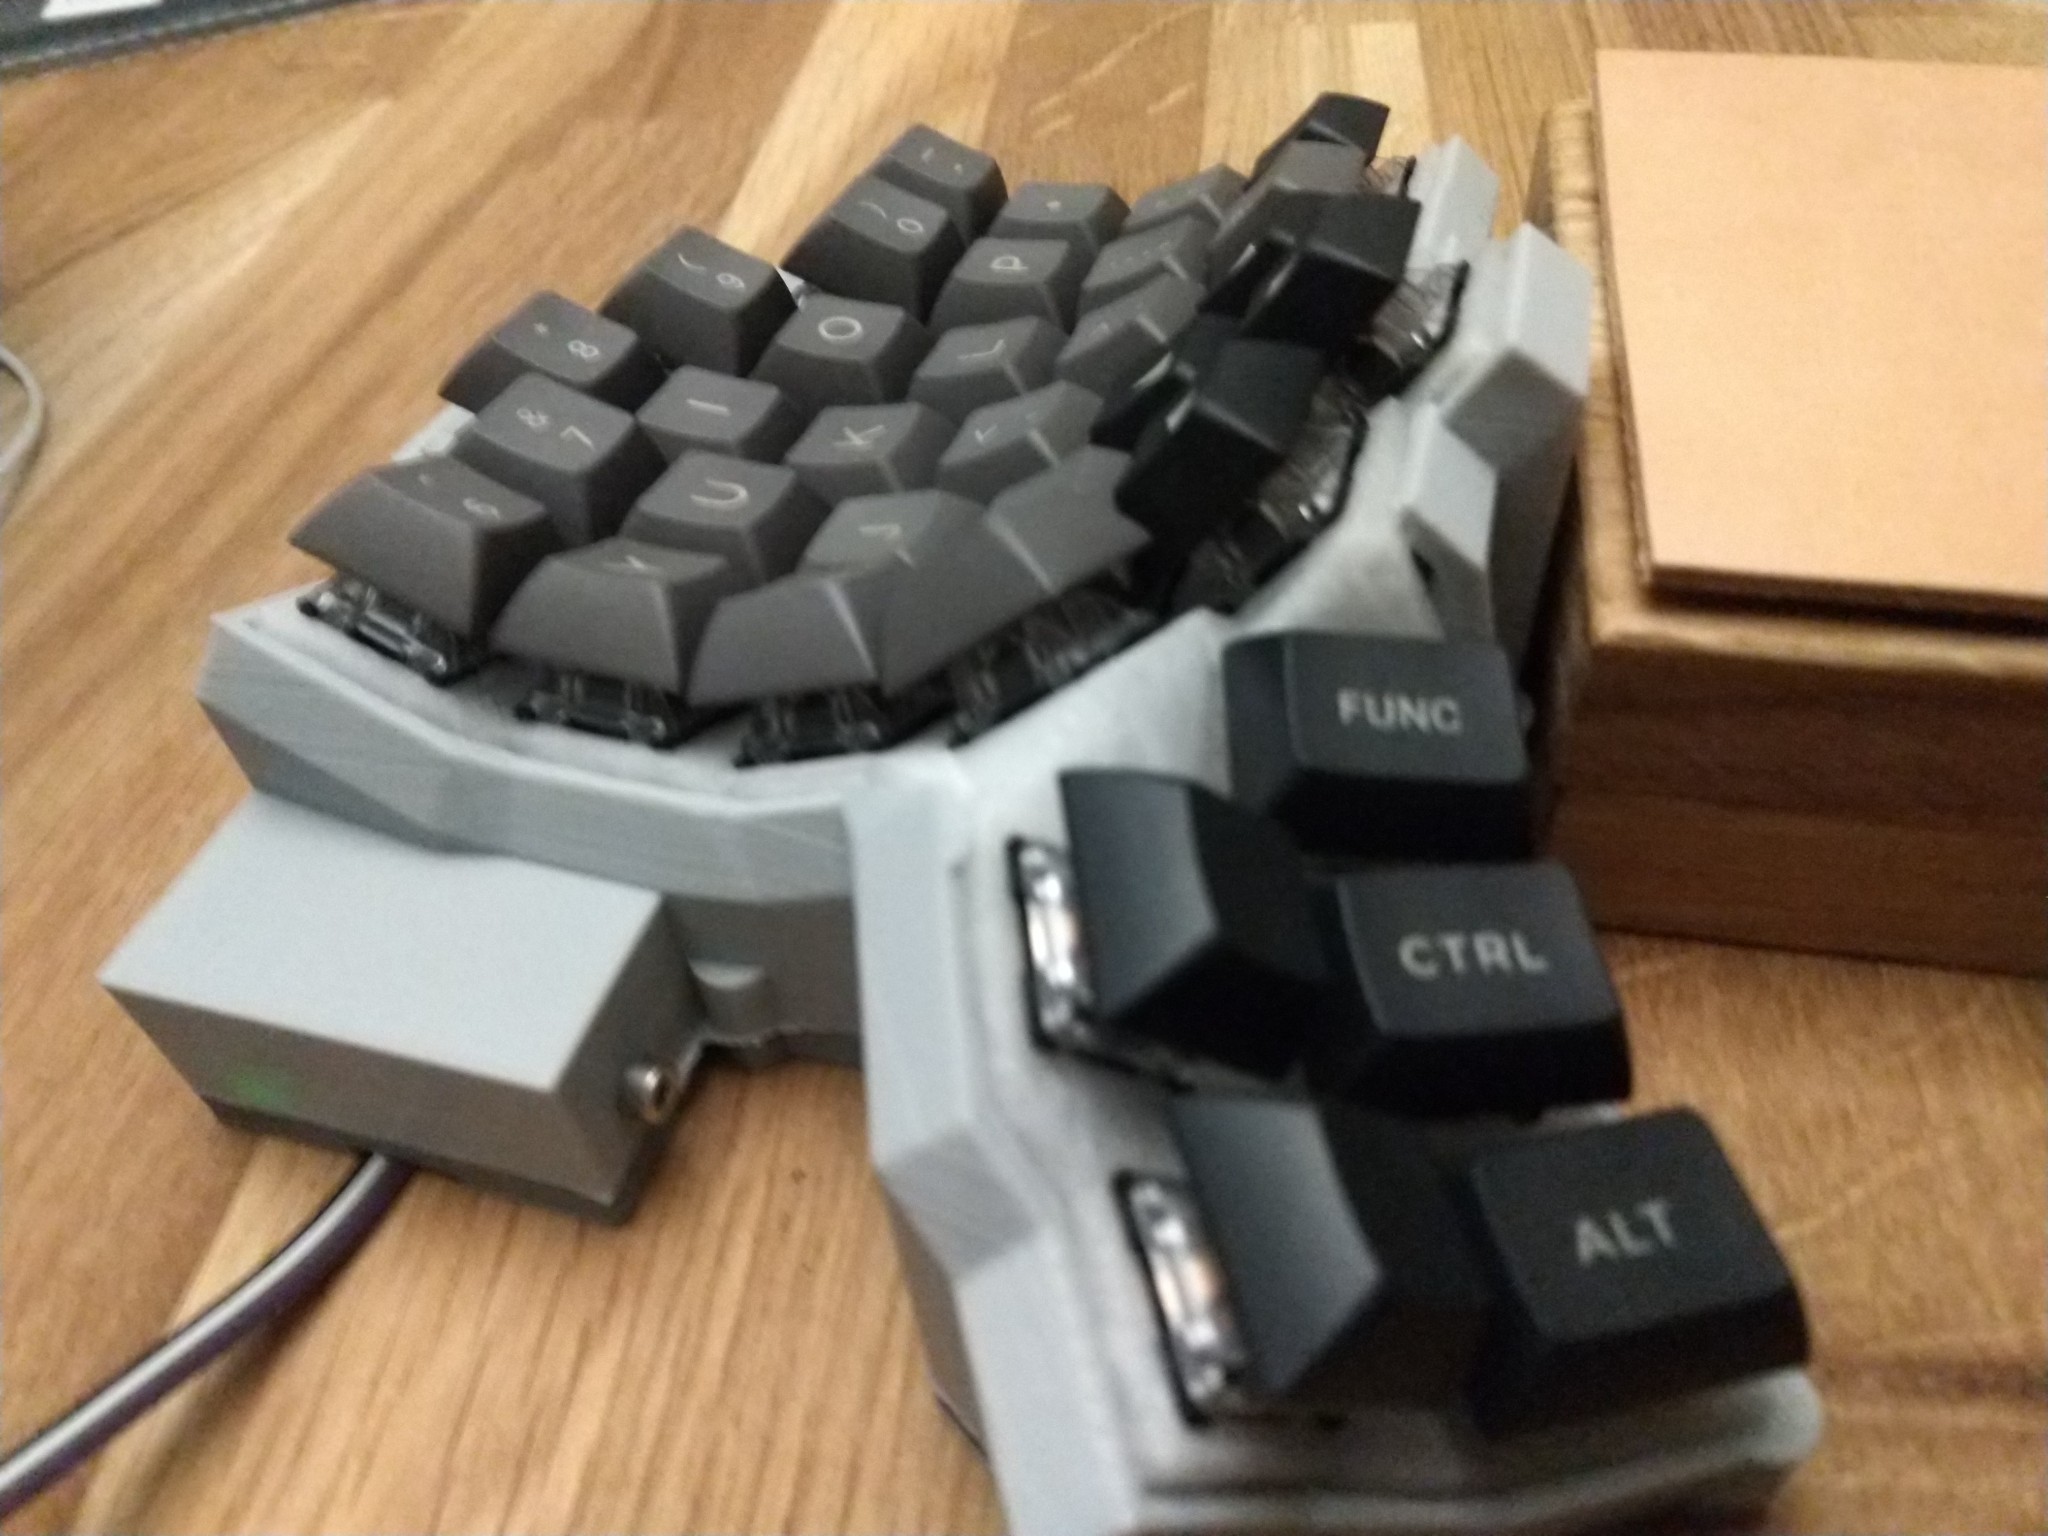
- 4-part modular design (keyswitch frame, body, bottom plate, wrist rest)
- FDM friendly
- Easy access to frame for less than soldering
- Possibility to use different materials for different parts
- No need to solder to the promicro board. (There is enough room for headers and connectors)
Build the Yak
You can build your own Yak in just 10 very hard steps:
Source 66 Cherry MX keyswitches, DSA keycaps, and 1N4148 diodes; two promicro boards; 20 socket-head 8mm M3 screws; 2 m3 nuts.
- optional for backlight: 2 leds; 2 220 ohms resistors.
Make physical copies of the models
Download a modified QMK and flash it on the promicro boards:
nix-shell --run "make handwired/yak:default:avrdude-split-left"
nix-shell --run "make handwired/yak:default:avrdude-split-right"
Insert keyswitches, and wire them according to the layout (see the QMK tutorial on handwiring).
Build wrist rests with some hardwood pieces, for example:
- Cut two 10 × 8 × 4 cm blocks
- Drill mortises to fit the bottom plate tenons (Use an 8mm drill bit)
- Somehow cut out room for the bottom plate support
Snap the frame into place (lower row first).
Insert the promicro boards and secure them with nuts and bolts.
Connect all the components and wires according to the config (see QMK tutorial on split keyboards and backlight).
Screw the bottom plate to the body (if the body is PLA, heat the screws to about 150°C to tap the threads), and fit the wrist rests into place.
Connect the two halves before powering either of them with a micro usb cable.
Shave the Yak
The Yak models are generated with a Haskell DSL targetting OpenSCAD. Check this page for information on the design and the technology.